Showing posts with label off road. Show all posts

Saturday, November 22, 2014

WR250R Maintenance Update 11.11.14

Just completed another wave of maintenance and mods to the Awesome Possum. Wrenching on the bike in the garage on a rainy day is very relaxing :-)

First, I swapped out the stock fuel tank with a new 3.1 gallon IMS tank. This procedure was pretty easy and smooth for the most part. Here are the two tanks next to each other for comparison.


The thank mounted up nicely with all of the existing brackets and hardware, and the only thing that I had to tweak was to slightly bend the two aluminum tank plastic side cover 'hooks' so that they latched onto the back side of the plastic covers a little bit easier.

I also took the opportunity to pop in a new spark plug while I had the tank off and it was easy to get to. Got the new plug and set the gaps, put it in, and WHAM started right up. Turns out the new plug has made it start better, run smoother, and even the throttle response is better. Go figure.

One of the things I knew about before I even bought this IMS tank was the potential of an uneven fit against the seat and the plastics, so here's a shot of what those gaps look like after install. I think the gaps are fine, and I'll eventually be replacing or modifying the stock seat anyhow, so that how situation will change anyway.


The tank is barely wider than stock, and most of the extra capacity is noticeable at the top of the tank where it protrudes a lot higher than stock. Here is a detail of how the width of the new tank offsets the plastic side covers a bit from stock position.


And finally a shot of the finished installation. I'd say the process was easy and it looks pretty good. Looking forward to getting it out on the road and the trails.


Next up: swap out the stock handlebars for some new ProTaper bars, plus some new grips, throttle sleeve, ProTaper bar risers, and Doubletake mirrors. Here are the stock bars after being stripped down...looking kinda naked.


Here's a shot of the stock and new bars next to each other for comparison.


And here's how much longer the new bars are than the stock ones on each end.


Stock bars off...now she's REALLY looking naked! I hear all the cool kids are going with this really stripped down cafe racer look now... :-) That's the box and wrapping from the IMS tank in the background...haven't taken care of the recycling yet!


Now onto the new bar install. This process turned out to be a lot more work and trouble than the tank swap. The one thing I regret about the whole process: I wish I had just gone on and got the new Highway Dirt Bike hand guards that I want, instead of trying to save money by putting the old Tusk D-Flex guards back on that I already had. I spent a lot of money this time around on parts, plus I ordered some cool new saddle bags that'll be shipping in December.

So I thought, put the old guards back on and get the HDBs later to spread the financial sting a bit. Well, since I got the 1-1/8" ProTaper bars, that turned out to be a big pain in the ass. I ended up having to get different bar 'mid clamps' to make the D-Flex guards work on the larger, tapered bars, and in the process I ended up scratching my new bars way more than I should have or wanted to. Damn it to hell. I ended up making it all work, but I wish in retrospect that I would have just sprung of the new HDBs during this install and had it all done right to begin with. Oh well, you live and learn.

Ran into a few issues re-installing all the existing hardware and switches on the new bars. I eventually realized that there is a small pin extension on the inside of the kill/starter switch housing that locks the casing in place on the stock handlebars. Once I figured that out, I was able to simply file the pin down so that it did not interfere with resting on the new bars. Here I am pointing at the pin extension with my pliers...


And here are the position holes on the stock bars for the pins on the housing, plus another position hole for something that I could not find a match for. Everything else fit on the new bars without interference, so not sure what the second hole is for.


Ran into another issue - for some reason my new Motion Pro throttle sleeve was fitting a bit too snug inside the throttle housing, so I had to file it down a bit so that it was not rubbing and sticking. Now it works fine and the throttle seems to twist and snap back as it should.

Of course during the process of re-mounting everything on the right hand side of the bars, at some point I inadvertently loosened the banjo bolt on the brake line, and later when I squeezed the front brake while moving the bike, brake fluid shot out all over the place. Dang it! Got'er tightened and cleaned up, then got back to the tasks at hand.

And finally, here is everything installed. New ProTaper bars, risers, and pillow top grips, Doubletake mirrors, and bar end inserts for the existing D-flex guards.


Definitely looks nicer and cleaner than it did before, and I hear tell these thicker bars feel much better on the road (less vibration?). Looking forward to testing them out on the roads and trails.


Oh, and a detail shot of the new risers, too. You can install them like this or flipped toward the inside...I chose to install them this way just cuz.


And the last item in this wave of mods was to permanently mount my Rotopax mount to my Pro Moto Billet rear rack. I am planning on using installing some nice new side bags and a tank bag, so I won't be putting bags on the rear rack that often. I want to be able to slap on my Rotopax 1 gallon tank for longer rides, giving me 4 gallons total at any one time. I had to take the rack off and work some mojo to get the bottom backing plate on, but it all worked out fine and is solid as a rock. Here's the mounted mount...


And a shot of the tank on the rack.


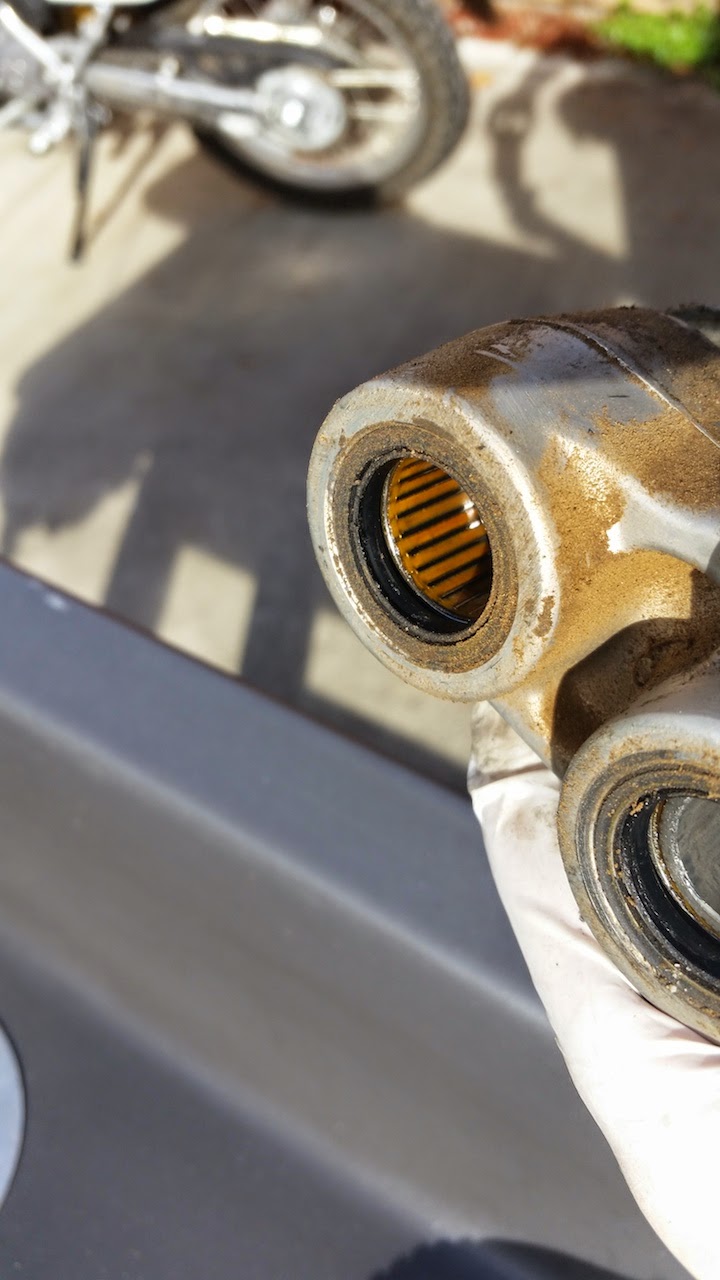
Well, that all pretty much broke the bank for the moment, so that'll do for now. Gonna change the oil and oil filter later today, and familiarize myself a bit more with all the digital display options on the dashboard.


Next up for mods/maintenance will be a fork rebuild kit, HDB hand guards, and adding some small auxiliary LED front headlamps.

Thursday, November 6, 2014

Maintenance Update on the WR250R

Well, now that I've had the WR for a couple of weeks, I jumped right in and did some needed maintenance on the Awesome Possum this week. I wanted to change the gearing and install a new drive chain, so I decided to just remove everything from the rear end and get it all cleaned up, re-greased, and adjusted. Here is my maintenance report...read it and weep. Or maybe just skip it and go have yourself a beer.

Here it is up on the bench ready to be tore down...
.
And here it is with "pants removed". This is borderline NSFW, people, so keep it clean!

Oh boy oh boy I got to finally use my fancy new Benchtop Pro parts washer for this occasion. I bought the washer back in the spring, but have not really had enough parts to clean in one go or a big enough maintenance job to make it worth setting up. The idea is that it circulates water mixed with microbes that eat all the grease and oil - the same stuff that they used to clean up oil spills in the ocean. You never have to dump this out or worry about the disposing the waste...it cleans itself, and is non-toxic. You just add water and new microbes over time as needed. Hey, if Jay Leno uses one in his garage, how bad can it be? 

Well, in theory this is great. Unfortunately, the hand actuated button on the pump wash hose stopped working, so I was pretty bummed about that. I was still able to use the circulating mix down in the sink drain, but ended up having to do a lot of old school Simple Green with some elbow grease to get everything cleaned up. Oh well. I'll get in touch with the BTP people this week and see what they can do to get this fixed.

Here's a shot of the fancy pants washer...when yer done you just fold it up and stow it away with the cocktail mix still inside.

Here I am starting to tear everything down, which is certainly a great way to really learn your bike inside and out. I took a lot of pics of every step for my own reference and won't bore you to death with those, but will include a few pics to show progress along the way. Here is the Yamalink decoupled from the arm relay...

Here is the swing arm once I got it removed...

I took the opportunity to remove and clean everything that I could while I had easy access under there...like this mess for example.

Removed the old chain slider and compared it to the new one. Here is the top side of both....

Aaaaannnnnddd the bottom side....

A peek at the relay arm pin bearings and seal...

Getting the swing arm bearings cleaned up and ready to repack with new grease...

Relay arm after it's bubble bath...

I also took out the rear wheel bearings, cleaned 'em up, and packed with new grease. Here is the cover being removed. Helps to have a little hook tool like this to grab that cover and pull it out...

After an initial clean and first layer of new waterproof grease....I packed a bunch more in there before I put the cover back on.

Finally, the new 47T sprocket is on - schwing!

And boy howdy, the interesting things that you discover and learn while doing this kind of maintenance. Here's one for you. While switching out the existing 14T front counter sprocket that the PO had put on with the stock 13T, I discovered that the PO had not pinged the lock nut for the front sprocket on the shaft, and it was starting to come off...wasn't even hand tight!

Read on if you like for more detailed maintenance drama, but don't feel bad if you don't!  I wish I had pics for these sections, but the ones I took for these steps turned out too blurry to use. What the hell? Guess I need to learn to use my new smart phone camera a little better.

Give Me A (Rear) Brake!
I hit a big snag with the rear brakes in trying to get the rear wheel back on. When I initially removed the rear wheel, I slipped a carpenter's pencil in between the brake pads to help keep them separated so that they would slip on easier later. Well, when I went to put the rear wheel on, nothing seemed to be lining up right. After some head scratching, I realized that I had mixed up the axle spacers while cleaning them, and had the longer one on the wrong side. Switched those around and the wheel lined up where it should. BUT, somehow along the way a tiny little tab on the bottom spring clip of the rear caliper got bent upward, and was blocking the brake pads from being able to swing far enough forward to slip/spring into their little slots where they live. Took me awhile to figure out that this is what was going on, and I am still not sure how the hell I managed to do that to begin with. Bent the tab back down and presto - the pads slipped into place.

Of course in my infinite wisdom during my difficulties with getting everything to line up and fit with the rear wheel and brake caliper fiasco, the carpenters pencil slipped out and I managed to close the pads too close for the brake disc to slip in. I couldn't get the caliper to push back in, so I then decided to try bleeding the brake a little. Well, that worked but ultimately wasn't really the problem (I didn't know yet that I had the axle spacers on wrong and that the caliper spring tab was bent).

After I FINALLY got all this sorted and got everything back together, I then discovered that I could not for the life of me get all the air bled out of the rear break line and master cylinder. Squishy squishy! On my old vintage Hondas I could bleed them by hand, using a simple hose from the bleed insert down to a mason jar with some fluid inside. But behold! Ye needs a proper MityVac brake bleed kit or equivalent to do this right! Well, I went and got myself one and indeed it did do most of the job, but the pedal still feels a wee more mushy than I would like, so I will keep trying. The rear brake does work, and I can even lock it up to slide, I just think it needs to be a bit more solid when I push it down than it is right now.

A complaint: During all this madness, I found myself annoyed at the fact that you cannot get even a short screw driver onto the rear master cylinder lid to get it off...you have to either remove the rear foot peg mount, or have a small ratchet that will fit under the foot peg bracket. Even if you have that, by the time you loosen the screws and lift up on the lid, there is not really enough room to get the damn lid off with the master cylinder boot underneath! I ended up breaking one of the two rear foot peg bracket allen bolts trying to take it off because is was seized, but it would have been nice to not have to remove it in the first place. The lid to the rear master cylinder should be much more simple to get to. Just say'n.

Working on the Chain Gang
I started to put on the clip-style master link for my new 520 chain, but decided that they were too flimsy and a bit difficult to install, so I opted to wait and ordered a rivet style master link instead. Finally got the chain together after wrestling with my new Motion Pro chain tool a bit, and figured out how to flare those hollow tip rivet style master links. I think she's on right without any kinks and with a loose enough tension, but I will keep a close eye on chain slider wear and anything that doesn't seem right.

AirboxWhen I got this bike, I knew the PO had messed with the airbox because he included the airbox door and hinge bolts in a baggie along with some other odds and ends. I went under the seat and side cover to investigate. Turns out all he did in the air department was to completely remove the airbox side door, nothing else. Flapper was still fully intact and operable. Since I have stock everything on this bike (exhaust, no programmer, etc.) I decided to take it back closer to real stock - I reinstalled the airbox side door (after inspecting the filter), but did decide to put a screw in the flapper door to keep it open. I don't see any reason to rip out all that flapper hardware at this point.

Speedo Healer
PO told me that he had put a "speedo thingy" under the seat but never got it to work, and had no documentation for it. I took the left side cover off and sure enough it was there. Through some investigation online, I found out that it is a Speedo DRD connected inline above the battery, and I located the instructions on how it all should work. After I test how my bike is running speed-wise indicated vs. GPS with the new gearing and the D606 tires, I might give that DRD unit a try and see if I can get it to work. For now, I just left it in place but it does not seem to be activated.

USB
Lastly, I added my 3D Powersports USB connector that I took off of my Honda CRF. I connected the fused hot lead to the switched brown wire that runs to the tail light, and the ground straight to the negative post on the battery. I found a little hiding place for the weatherproof USB connection up front on the left side of the fork head. just in front of the tank. Now I've got a switched weatherproof USB connection up front for my smartphone navigation.

Got all this done and took her for a spin around the neighborhood surface streets and a quick jaunt on the local highway. Three things I noticed right away. 1. The bike was much quieter with the airbox door re-installed, but did not seem to perform any different power-wise. 2. With the newly installed 13/47 gearing, the bike now crawls a bit slower without stalling but winds out a lot sooner on the highway at the top end. At 60 mph it sounded to me like it was screaming, whereas before I could hit over 70 before it started to sound like that. 3. Probably because of the new gearing, I stalled the bike several times - not while crawling, but while shifting up and down + accel/decel in the 2nd-3rd gear range. I didn't stall the bike at all with the 14/43 gearing...so this will probably just take some getting used to.

Ok - I think that gets me caught up for the moment. Really all I have left to do out of all this is to coax out what tiny little bit of air is left in the rear break system, and we'll be golden! For anyone who has tortured themselves by reading all the way through this post, I am certainly happy to hear any feedback that you might have! Cheers


Friday, October 24, 2014

Been awhile since I've posted, so time for an update. Long story short: been spending months looking into stepping up a notch with my dual sport. After endless research online and test riding a few bikes, I zeroed in on a Yamaha WR250R. It just showed up today (I had it transported from out of state), and here it is next to the existing CRF. It's interesting to note the difference in features, weight, etc. More to come, but for now just letting them get to know one another!


And here she is after the first test ride, and a little clean up and lube of her lower parts, if you know what I mean. Just switched over the hand guards from the CRF to the WRR, as this bike is definitely going to be a keeper!


Monday, September 1, 2014

New USB Power and Rear Rack Gas Tank Test

Did a little accessory installation today on the Awesome Possum. I installed a USB power cable from 3BR Powersports. Mounted the USB at the handlebars, and tapped the break light power lead so that the USB is not draining charge while the engine is switched off. I connected the ground to the battery negative terminal. The inline fuse ended up right next to the main fuse box, which was convenient. I also mounted my new RAM phone mount as well. All works well, but it will be interested to see how it charges over the course of a day while riding (will it make the phone too hot? will it slip with vibration? etc....) Some install pics....


Another thing that I will figure out is how to deal with that messy USB phone cable...right now I just have the excess wound up and strapped to the handlebar, but I'm sure that I will find a much neater way to manage that cable :-)

I also did a test install of my spare gas tank, which attaches to my new rear rack. Assembly was easy, and it fits on snugly. When I attach this tank, I should be able to put cargo on top of it...but I will have to be careful not to overload the rear rack until I can add some extra structural support underneath. Here's a couple of pics of the test install...


Tuesday, August 26, 2014

New Accessories

I've installed some new accessories onto the Awesome Possum, and I'm delighted. I installed the original muffler spark arrester, replacing the loud 'billet' muffler cap that had been installed by the previous owner. This makes the bike sound like it should, and makes it run much better!


I also installed a new rear cargo rack, which comes with an attachment to hold an auxiliary gas tank when needed…


Sunday, August 17, 2014

Dual Sport Motorcycling Navigation

My dual sport motorcycling lesson for the day: You can turn your smart phone into a super sophisticated navigation device that does not need a cell signal or internet connection to work, plus you can stream your route in real time, change course on the fly, save pics and make notes on points of interest, and many other features. You can make a turn-by-turn route on your computer, then upload it to your phone, and vice versa, or share routes with other people. You can also run the phone off the bike's battery so that you don't have to worry about it running out of juice. Oh, and some of the newer phones are waterproof so you can use them in the rain or if you go through water such as a creek crossing. Expensive, clunky, dedicated GPS devices (like Garmin) are done.

I'm getting my new smart phone this week, and I'll start playing around with the different apps that let you do all of the above. I'll also install the USB charger and phone mount on my bike. Once I get into all of that a bit, I'll report back with pics and details!

Tuesday, August 12, 2014

My New to Me Honda CRF230L Dual Sport

Well, I decided to sell the '79 Honda dual sport and get a modern one instead. The bike was just too nice to take off road and mess it up. So I just picked up a 2008 CRF230L last week, and have been getting it ready to hit the road and trails.


I got it in really good shape - only 452 miles on the clock. The bike was not assembled from its original crate by the dealer until late 2011, and was bought and titled by the original owner in 2012. They rode it mostly on the street, and dropped it on their first off road outing and decided not to ride it anymore. So now it's mine! It's mostly stock except for the bark buster hand guards, handlebars, and an aftermarket muffler tip.

I am going to replace the muffler tip back to the original stock spark arrester, as I want to see how the bike runs fully stock before I start making exhaust and carb modifications. I know many people make those modifications right away, but I really want to see the difference, and get used to the bike as it is first. Plus, the current muffler tip is a lot louder than I'd prefer.

Today I installed a Flatland skid plate, and just changed the oil and clean/lubed/adjusted the drive chain. Here's the new skid plate installed...


I'm waiting for the stock muffler tip to arrive, and I've also ordered a rear rack and auxiliary attachable gas tank for the rear. She's all set to go, and now I just need to find a day off work so that I can take her out on the trails for the first time!

Thursday, July 3, 2014

Vintage Honda Dual Sport

My name is Matt, and I have a vintage motorbike problem. Today I scored this 1979 Honda dual sport bike in fantastic condition with really low miles. The guy I bought it from just put a TON of new parts on the bike and was really OCD about keeping it clean and masterfully tuned. It's plated and street legal, but also ready to hit the dirt and the trails. The ironic thing is, it's actually too nice to take offroad! I'm toying with the idea of just keeping it street only and continue restoration, vs. taking the chance of taking it offroad and messing it up. I know that's what it was designed for, and it's perfectly able to do it, but in this condition and age it kinda seems tragic to take it off the pavement. I'll keep thinking on that...

New parts on the bike that I don't have to worry about include new: tires and tubes, exhaust with Supertrapp muffler, battery, front and rear sprockets, chain, shocks, air filter, oil filter, fuel lines and filter, vent and drain hoses, petcock, mirrors, rear break light, front and rear brakes, and fork tube seals and oil. I am one happy boy!